Showing posts with label recycle. Show all posts

October 08, 2011

Drapery Fabric Note Card Tutorial

I made these cards for a very special friend of mine who lives in West Texas.  
Her initials are DL...so if DL is reading this, then, uhm, -Look, over there...something shiny!...  
Whew...gotta distract the girl...these are for her birthday.
Remember this post...Silk Poppy Pin Tutorial and how I told you how I scored about 30 upholstery/drapery fabric sample books on Craigslist?...Well, for these cards I used the bottom of the fabric that has the glued paper backing.  It's perfect because the fabric doesn't fray or unravel. I just cut along the pink lines I have marked here...
... and I ended up with lots of these :
Beautiful colors and lots of textures.  The added bonus is that these books come with fabrics that are color coordinated so there is no guessing when choosing a color scheme.

I always try to have a stash of store bought blank cards because you just never know when you are going to need one, or several.  I usually buy cards at Hobby Lobby when they are 50% off .  

So, take one card, fold in half and add hot glue to the front, only on one side first like this:
quickly and with lots of care (hot glue is, well, um, HOT), place a fabric strip to the glue...
and repeat till you get to the end of the card...
and then the back should look like this:
Notice that the fabric strips are not lined up with the card...that's okay because now you are going to do this:
Trim the card on all sides. Now this step is not necessary but I do it just to get a crisper looking card.  I iron the inside of the card (the side that has the fabric) with 2 or 3 swift passes of the iron.  This remelts the lumpy hot glue and gives you an even glue coverage between the card and the fabric.  Once you iron the card, place it immediately between two heavy books and let it cool down. Also, just in case you don't have sample fabric books just laying around, you can use double sided scrapbook paper. 
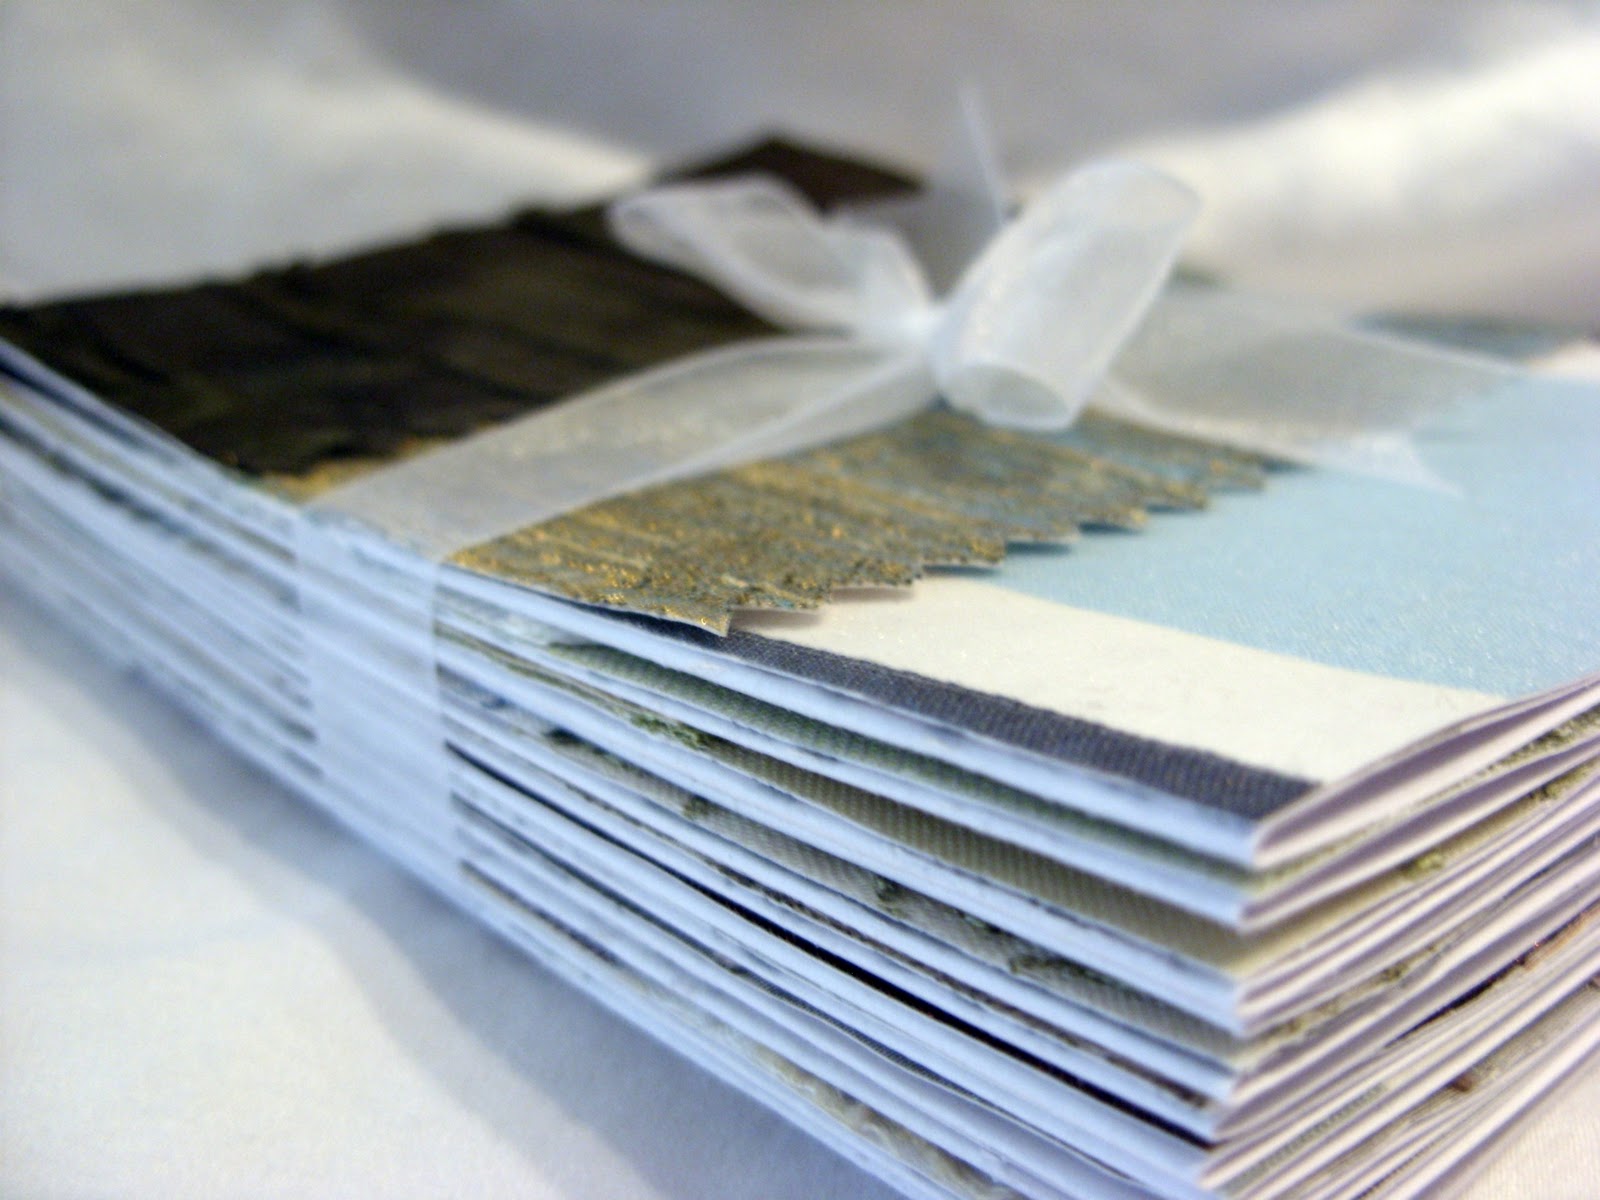
Aren't these beautiful?
I made a set of 12

Add a bow...
 and they are ready to be mailed off to my sweet friend DL.  And DL, if you did read this that's okay. 
Thanks for being my friend; 584 miles away. Happy Birthday.


October 03, 2011

Silk Poppy Pin Tutorial

I'm sure you've seen these around, but just in case you haven't, here is a quick tutorial on how to make your own poppy flower pin.
You will need some silk fabric, a tea candle, fire, beads, pin, needle and thread.  About a year ago, a local designer was giving away outdated upholstery/drapery fabric sample books on Craigslist.  I called and made a mad dash to her studio. I came home with this:
Over 30 books all neatly kept in a trunk.  I clip and cut as I need from my never ending stash. For this flower I used some silk fabrics that I cut from the sample books.  If you don't have sample fabric books just laying around, don't worry.  I have used skirt lining fabric in the past and the flowers come out gorgeous. Here is a chocolate colored rose made from skirt lining:
Okay, the tutorial...cut out several circles from your fabric. You want to vary the size of the circles.  My largest circle was about 4 inches in diameter while the smallest was about 2 inches in diameter. I cut out several circles all from different samples.
Light the candle and very carefully, lightly singe the edge of the circle.  All you want to do is to prevent the fabric from fraying.  Sometimes, depending on the fabric, the fabric will curl in, and that's okay.

What is not okay is this; these actually caught fire!! So be very careful not to scorch your circles, or your house for that matter.
These turned out nice and rufflely...
Once you have all your circles done, choose which ones you want to use for your flower.  Play around with the position of the circles making sure to layer from the bottom up and from the largest circle to the smallest. Once you got the perfect combination, sew the circles together, sew on the beads and hot glue a pin to the back.
Don't be afraid to play with different color combinations.
And if you are still leery about making your own, you can always win one here.

May 24, 2011

Popcorn Box Journal

With school almost over and summer vacation right around the corner, what better way to say "Thanks" to my kid's teachers (for putting up with, er, I mean, for enriching the lives of my kids) than by giving them something that they will enjoy in more ways than one...and who knows, you might just get some extra credit points along the way. Not only is this gift delicious, it is also EARTH friendly because instead of throwing away your box of cereal, mac-n-cheese or POPCORN, you turn your box into a one-of-a-kind journal. 

For this journal I used a box of popcorn because a certain Ms. "H" loves her popcorn but you can use any box really.

You will need the following:
-1 box of popcorn, or cereal, or granola bars, or whatever your teacher likes
-31 single sheets of copy paper (8 x 11)
-1 single hole puncher (makes holes one at a time)
-3 small birthday candles (huh? trust me...get the candles)
-clear tape
-3/4 yard of thin ribbon
-a credit card (again, trust me)

First,  fold all of the copy paper "hot dog" style (long style) and run your credit card on the fold to make sure you get a nice, smooth, thin crease.  Make sure that all your folded sheets look nice and even.  Now, get one sheet from your stack and hole punch several evenly spaced holes about 1/4 of an inch from the folded edge.  This sheet you will use as a template for the other 30.  To give you an idea, I hole punched 22 holes into my template. Now use your template to hole punch the rest of your 30 sheets.  Make sure that you line up your folded seams. 
Once done, have your significant other massage your hole-punching-hand...you're welcome.

Now carefully cut the box in a manner that gives you a "front" part of the box and a "back" part of the box. 
Gently pull apart all the flaps until you have two flat pieces of cardboard. Lay a folded sheet on top of the front of the box and do the same for the back.  This gives you a good idea of how big of a cover to cut out.   Use the folded seams of the box to guide you as you cut out the covers.  
Leave about a 3/4 inch ONLY on one side of the front and the back covers.  Using a folded paper as your guide, fold or bend the 3/4 inch for each cover. Once the journal is assembled, these folded/bended flaps will nicely fold into each other and give the journal a polished look as seen in the first picture.
Again, use your credit card to smooth out the crease. Use your template to hole punch both covers. 
Now sandwich your back cover, the copy paper and the front cover together making sure to line up the holes you punched out.  Count 5 holes up from the bottom and insert a candle right through all the holes.  Holes 1 through 4 should be lined up.  Now count 5 more holes up from the first candle and insert another candle.  Holes 6 through 10 should be lined up. (Sorry for the non pictures here.) 

Now you are ready to thread your ribbon. Tape one end of the ribbon to the 3rd birthday candle.  You will use the candle as a "needle" to thread your ribbon through the holes of the journal. 
Starting at the bottom, insert the candle through hole 1 and leave double the length of the journal in ribbon.  This tail will be woven into the spine of the journal and wind up at the top of the journal.  It will serve as a "book" mark.  Now go over the spine and around to the back of the journal and insert candle into hole 2; up and through the hole and over the spine and around to the back of the journal and insert candle into hole 3; repeat until you reach the top.  Make sure that the ribbon tail is nicely tucked underneath your ribbon threading and that your threading isn't too tight or loose. AND remember to continue moving candles 1 and 2 up to keep your holes lined up.
Once you get to the top, measure and cut another ribbon tail to match the first one.  Tie the two tails together into a knot.  Now these can be used as book marks. 
And please, please don't forget to give the teacher the bags of popcorn that came in the box now turned spiffy journal. 


How's that for extra credit? And as always, if something didn't make sense, just email me and I will try to clarify.  


Related Posts Plugin for WordPress, Blogger...