Showing posts with label creativity. Show all posts

November 01, 2011

Every once in awhile...

our kitchen table looks like this...
it just happens when my kids get into "craft" mode...
sometimes they end up like this...
and when they let their imaginations go wild...
Samantha and Joshua's Pet Rock Collection 2011
they make and create...
Joshua's                  ~Fabric Paint Mix~               Samantha's
and I'm bursting at the seams with love, joy and pride.

October 08, 2011

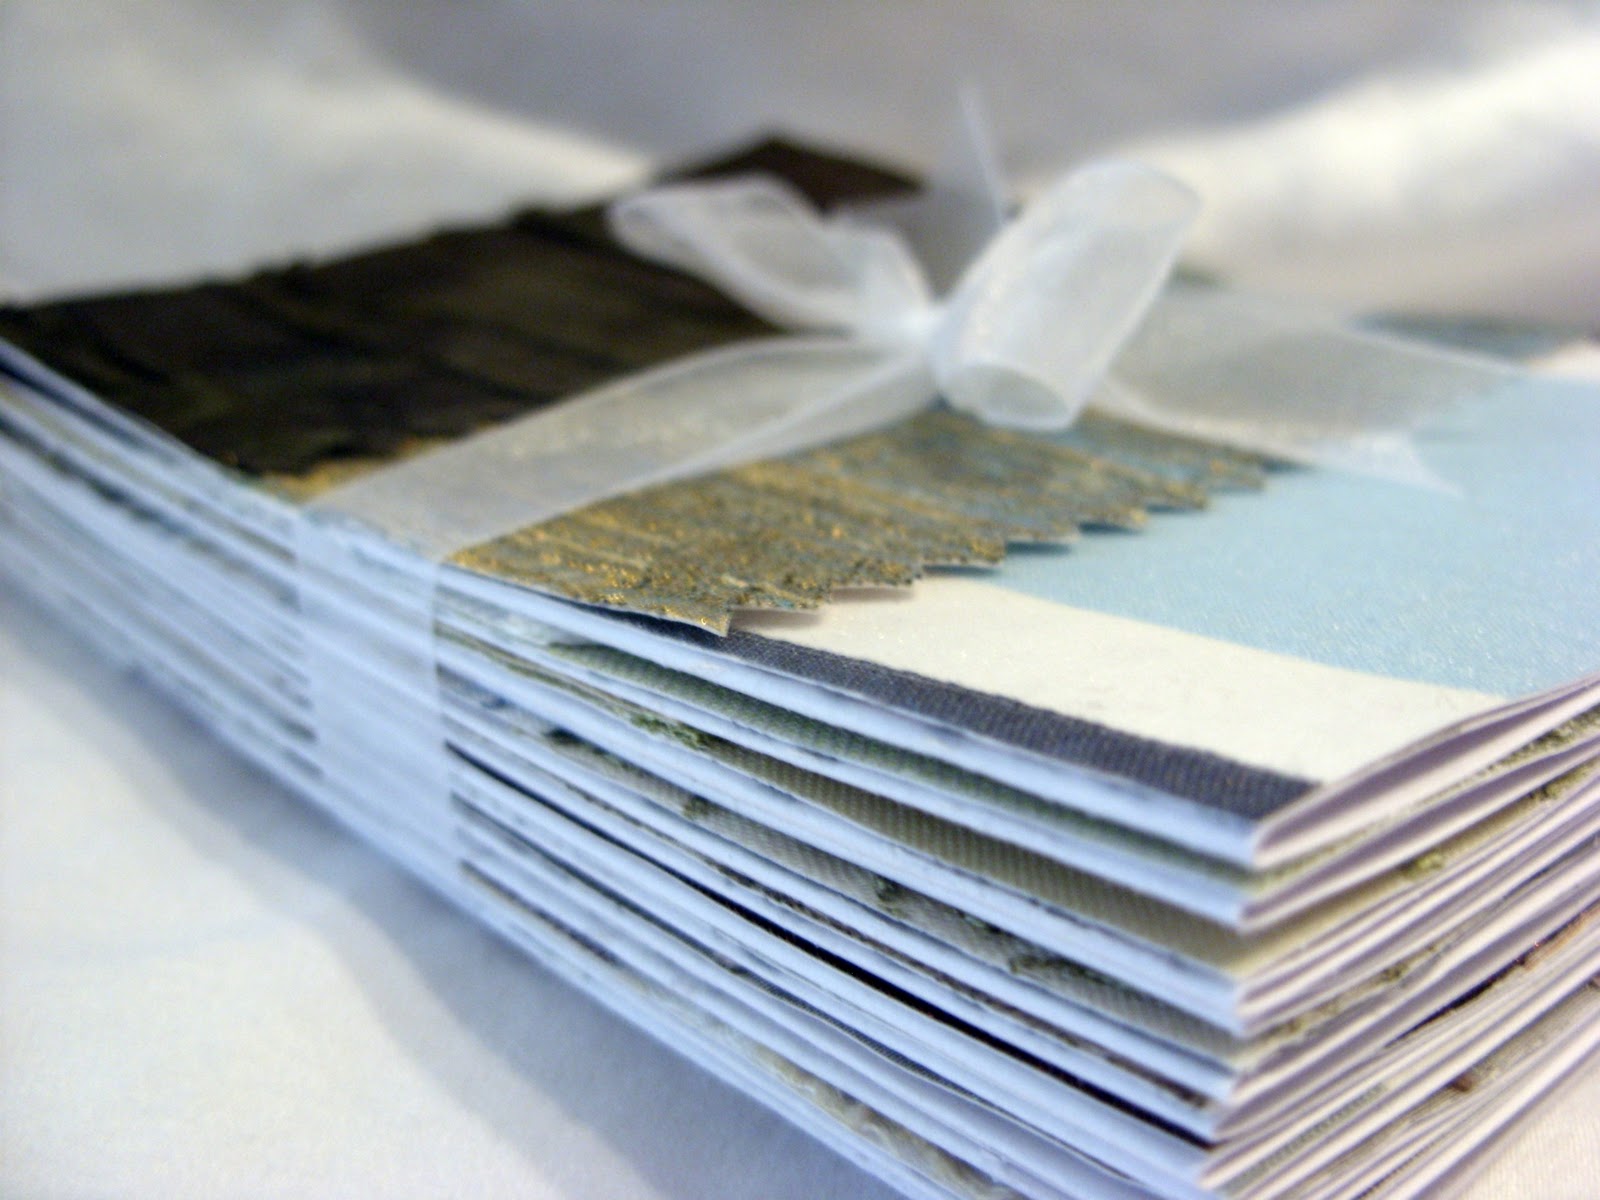
Drapery Fabric Note Card Tutorial

I made these cards for a very special friend of mine who lives in West Texas.  
Her initials are DL...so if DL is reading this, then, uhm, -Look, over there...something shiny!...  
Whew...gotta distract the girl...these are for her birthday.
Remember this post...Silk Poppy Pin Tutorial and how I told you how I scored about 30 upholstery/drapery fabric sample books on Craigslist?...Well, for these cards I used the bottom of the fabric that has the glued paper backing.  It's perfect because the fabric doesn't fray or unravel. I just cut along the pink lines I have marked here...
... and I ended up with lots of these :
Beautiful colors and lots of textures.  The added bonus is that these books come with fabrics that are color coordinated so there is no guessing when choosing a color scheme.

I always try to have a stash of store bought blank cards because you just never know when you are going to need one, or several.  I usually buy cards at Hobby Lobby when they are 50% off .  

So, take one card, fold in half and add hot glue to the front, only on one side first like this:
quickly and with lots of care (hot glue is, well, um, HOT), place a fabric strip to the glue...
and repeat till you get to the end of the card...
and then the back should look like this:
Notice that the fabric strips are not lined up with the card...that's okay because now you are going to do this:
Trim the card on all sides. Now this step is not necessary but I do it just to get a crisper looking card.  I iron the inside of the card (the side that has the fabric) with 2 or 3 swift passes of the iron.  This remelts the lumpy hot glue and gives you an even glue coverage between the card and the fabric.  Once you iron the card, place it immediately between two heavy books and let it cool down. Also, just in case you don't have sample fabric books just laying around, you can use double sided scrapbook paper. 
Aren't these beautiful?
I made a set of 12

Add a bow...
 and they are ready to be mailed off to my sweet friend DL.  And DL, if you did read this that's okay. 
Thanks for being my friend; 584 miles away. Happy Birthday.


October 03, 2011

Silk Poppy Pin Tutorial

I'm sure you've seen these around, but just in case you haven't, here is a quick tutorial on how to make your own poppy flower pin.
You will need some silk fabric, a tea candle, fire, beads, pin, needle and thread.  About a year ago, a local designer was giving away outdated upholstery/drapery fabric sample books on Craigslist.  I called and made a mad dash to her studio. I came home with this:
Over 30 books all neatly kept in a trunk.  I clip and cut as I need from my never ending stash. For this flower I used some silk fabrics that I cut from the sample books.  If you don't have sample fabric books just laying around, don't worry.  I have used skirt lining fabric in the past and the flowers come out gorgeous. Here is a chocolate colored rose made from skirt lining:
Okay, the tutorial...cut out several circles from your fabric. You want to vary the size of the circles.  My largest circle was about 4 inches in diameter while the smallest was about 2 inches in diameter. I cut out several circles all from different samples.
Light the candle and very carefully, lightly singe the edge of the circle.  All you want to do is to prevent the fabric from fraying.  Sometimes, depending on the fabric, the fabric will curl in, and that's okay.

What is not okay is this; these actually caught fire!! So be very careful not to scorch your circles, or your house for that matter.
These turned out nice and rufflely...
Once you have all your circles done, choose which ones you want to use for your flower.  Play around with the position of the circles making sure to layer from the bottom up and from the largest circle to the smallest. Once you got the perfect combination, sew the circles together, sew on the beads and hot glue a pin to the back.
Don't be afraid to play with different color combinations.
And if you are still leery about making your own, you can always win one here.

April 02, 2011

Make and Create

For awhile now I have been praying for God to bless my hands in all that I do. This includes preparing meals for my family, cleaning house and crafting. I have always had a knack for details and creativity. I was the one at home that had a tool box full of fabric paints, gems, glitter and ribbons. Everything that I wore sparkled and I loved it. My mom was the seamstress and I was the embellisher. But it didn’t stop there. There were the floral arrangements, the crocheting, the homecoming corsages (if you live in West Texas you know how big these are), the homemade get-well and birthday cards and on and on. By the time I was in my 20’s, I had several tool boxes that housed my “tools of the trade”.


Then Life happened. I got married. I moved across Texas. I worked. I had kids. I didn’t have time anymore. But when my oldest turned one, I made her birthday invitations. I stayed up way past my bedtime for many nights. Folding pretty scrapbook paper, gluing tiny flowers, and making matching envelopes made my heart race. I missed that part of myself.


Eight years later, here I am ready to make and create. So, I give you RoCa and Company. “Ro” are the first letters in my husband’s name; Roberto. “Ca” are the first two letters in my name; Carmen. The “and Company” are our two great kids. RoCa and Company would not be possible if it weren’t for God’s will in my life, my family’s love and support and for you who is reading this. Check in every once in awhile and hopefully you can make and create with me.

Carmen


Related Posts Plugin for WordPress, Blogger...