October 26, 2011

You Rock #6 Features

We had 63 incredible project link-ups last week. 
All of  them are very creative in very special ways...thanks for all of you who linked up and shared your inspiration with us.

Here is the most viewed link-up that ROCKED IT last week....
The Elizabeth Dress by A Couple of Craft Addicts. This is such a beautiful dress, so vintage looking yet it has a bold modern twist on the back...go check it out.

My favorite three projects were:

This Scrap Necklace by Dazed. And then some.  Didn't know scrap silk and beads could look so amazing...sorry little sis...gonna cut up that silk giraffe blouse you gave me and making me one of these. 

Next is this Shag Heart Pillow that Shannon Sews made piece by piece...and all her hard work paid off because the finished pillow is just amazing.
  
And last, are these clothespin ballerinas by Southern Crafty Girl. These are off the chart too cute! Go check out what happened to the other clothespins that didn't make the ballerina makeover.

So there you have it...4 brilliant projects from 4 very different crafters.  Thank you to all who linked up last week...make sure to come back this coming Friday so we can continue to Make and Create together. If your project was featured, make sure to grab your button.


<div align="center"><a href="http://www.rocaandcompany.blogspot.com" title="roca and company"><img src="http://i55.tinypic.com/309lhg8.jpg" alt="roca and company" style="border:none;" /></a></div>


October 22, 2011

3D Flower Tee Tutorial

Sometimes I tend to take things just a little overboard...as a case in point, just look at what I sewed for Sam the other night...
see what I mean?  A humongo 3D beaded flower appliqued tee.  

Sam and I L.O.V.E. how this shirt turned out. We both especially like how the wavy petals and leaf give the shirt dimension.
Want to make one? 
But first a disclaimer: I want to apologize for not taking enough pictures for some of these steps...not only do I tend to go overboard at times but I also tend to forget to take pictures along the way when "crafting". So if you have questions, please email me...
3D Flower Tee Tutorial

I started out with 3 tee shirts: a plain long sleeved thrifted shirt and two patterned tee shirts that I already had.  The floral one should look familiar to you...it's the same as the one I used for this shirt here. The striped one was already in my stash of shirts that no longer fit Sam.

Making the flower applique
1. Cut your tee across at the arm pits.  
Now you should have a tube from the bottom part of the tee.  

2. Cut down the sides of this tee tube. You should have two pieces. Use fusible web to fuse these two pieces together...WRONG SIDES to each other.  

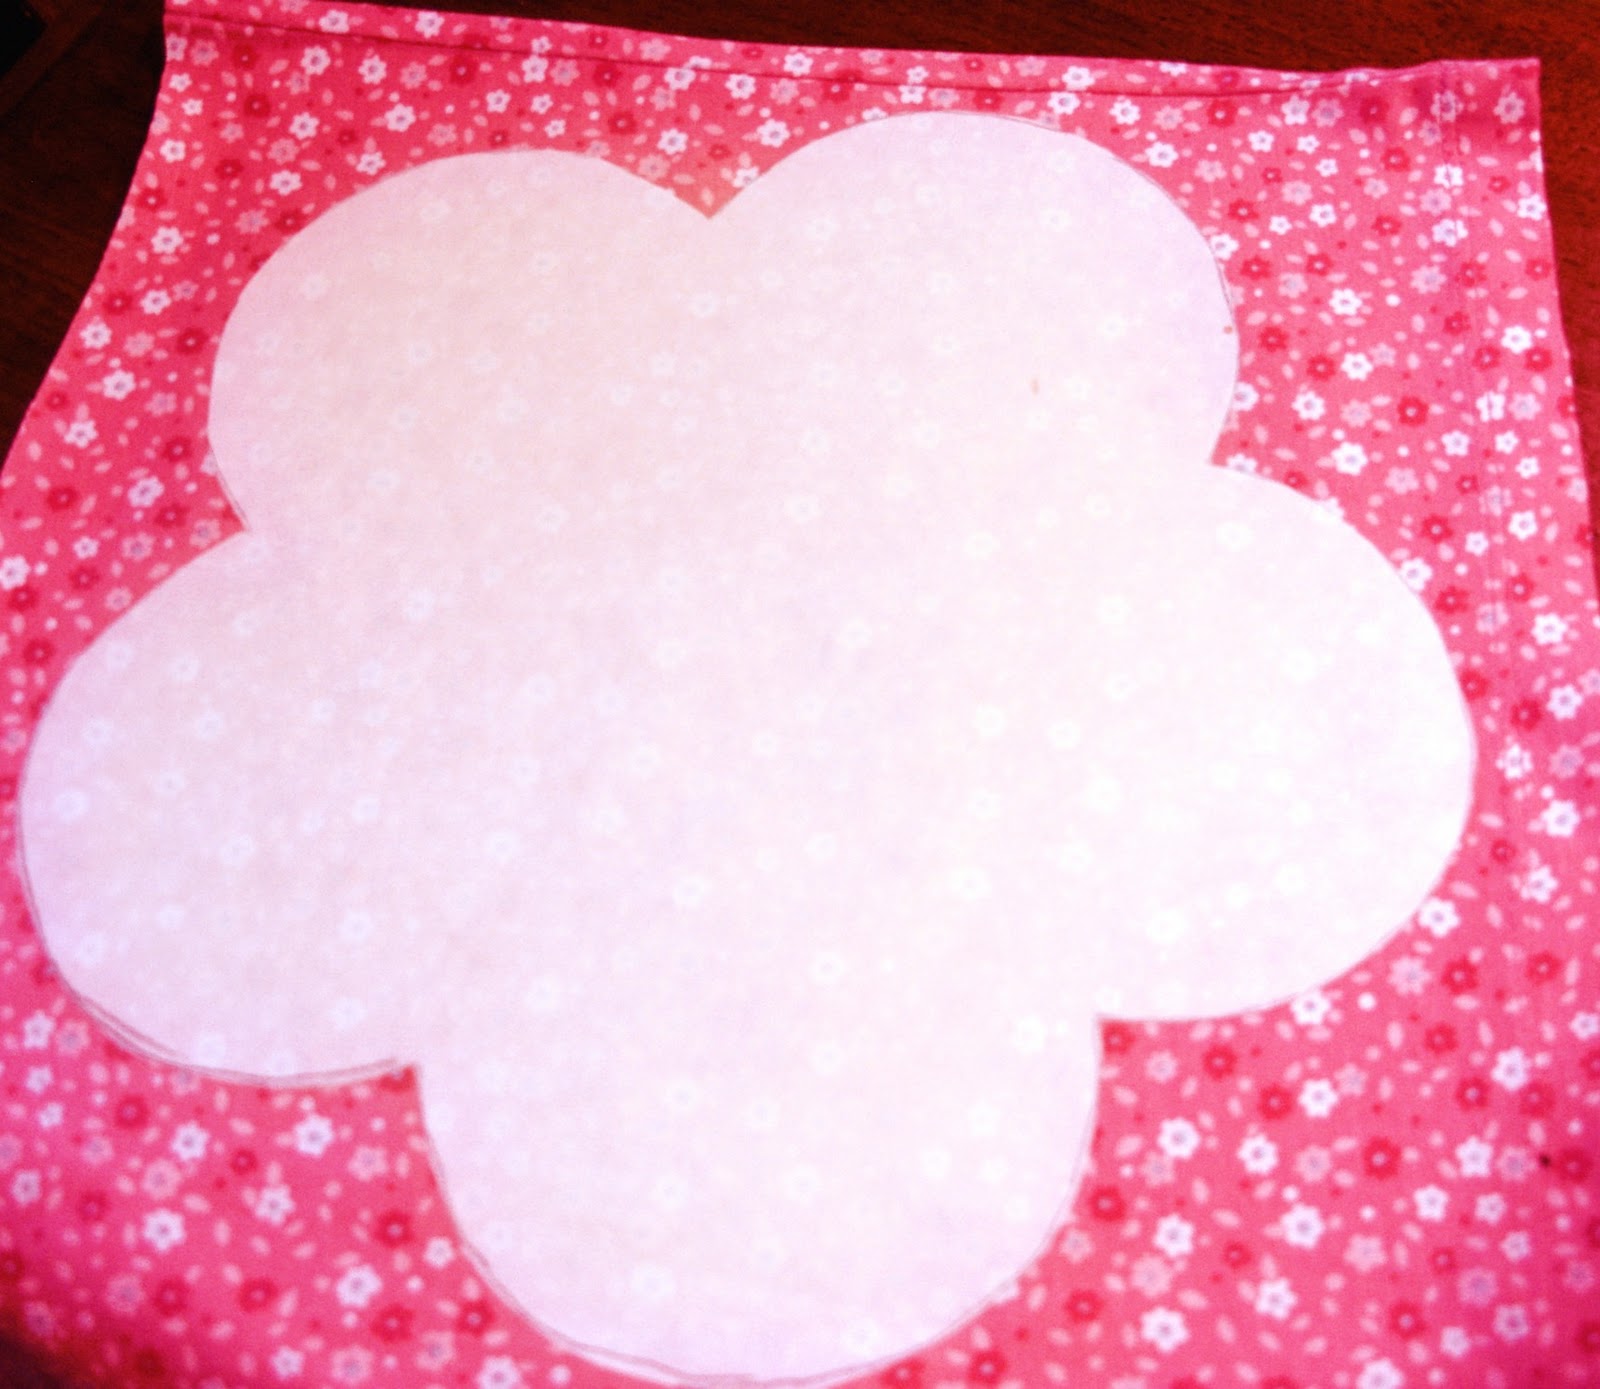
3. Make a flower pattern using freezer paper.  You can free hand it or do like me, find an image on the web, copy and paste to a word document and enlarge...trace your image onto the dull side of the freezer paper.

4. Iron on the freezer paper, shinny side down, onto the fused fabric. Let the fabric cool down and using the outline of the flower, cut out the flower piece. 

5. Now find a plate that is large enough to cover up most of the center of the flower.  Using said plate, make a pattern on freezer paper.  Iron on the freezer paper to right side of fabric and then iron on fusible web to the wrong side of fabric. This circle is only one piece of fabric and not two like the flower part. Once cooled, cut out circle. Now you have the second part to your applique. 

6. Repeat the above process but now use a smaller plate to make the inner circle. Now you should have a flower and two different sized circles.  

Assembling the flower applique 
7. Lay down the flower piece and lay the bigger circle on top, making sure to center it.  Be sure to have the wrong side, the one with the fusible web, down. Iron on that circle to the flower.  Now repeat with the smaller circle.

8. Now that the flower is all fused together, zig-zag around all the edges. Use a tight zig-zag stitch. I used the shortest stitch length and the longest stitch width to get a nice tight zig-zag. I also used the gap on the sewing foot as a guide while sewing the edge.  It works every time.  
9.  Sew on beads if you want.  Since this fabric had small flowers with a blueish center, I just sewed on a bead at each of the blueish centers.
10. Use freezer paper and draw out a stem and leaf. Follow the steps 3 and 4 to make, cut and fuse the stem to your shirt.  
Once fused, zig-zag the edge of the stem to the shirt.
11. For the leaf, follow step 2...it needs to be double-sided. Zig-zag the leaf edges. Pin the leaf onto the shirt and sew a straight stitch down the middle of the leaf onto the shirt.
12. Now position your flower onto your shirt. Pin it securely and
 sew a straight stitch right along the inner edge of your zig-zag stitch. Again, use the gap on your sewing foot to guide you.
*Make sure to alternate your fabric patterns when cutting out the flower, circles, stem and leaf so that your shirt has a contrasting pattern to it. 

This has been the hardest tutorial I have ever written because of the lack of photos, but I hope it made sense to you.  If not, please just email me and I will try to clear it up for you.  


October 21, 2011

You ROCK #6

Huge shout out to my Sammie Girl...She became a 1st Squire of the
 EarlyAct FirstKnight for demonstrating above and beyond character traits of Honesty and Responsibility...a very noble honor. Way to go girl!! Who knew a princess could become a Squire? We are so very proud of you...keep it up!  
For more information on the EarlyAct FirstKnight program, click here.
~.~.~.~.~.~.~.~.~.~.~.~.~.~.~.~.~.~.~.~.~.~.~.~.~.~.~.~.~.~.~.~.~.~.~
So, are you ready to ROCK IT?!
Here are the very simple to follow rules:
1. Link up something that YOU made: sewing, craft, recipe, anything that you would like to share, etc…
2. Link up to the specific post; not your blog.
3. No linking giveaways or items for sale.
4. Visit and comment/encourage at least one fellow blogger friend.
5. Grab this button and post on your blog or post...just somewhere where others can come and link up as well.


<div align="center"><a href="http://www.rocaandcompany.blogspot.com" title="rocaandcompany"><img src="http://i52.tinypic.com/u3mky.jpg" alt="rocaandcompany" style="border:none;" /></a></div>

 And just a simple request, it's optional, only if you want, I'm not gonna make you, BUT it would be nice if you would follow RoCa and Company. 
So you ready to Party?! Let's ROCK this place!
Also, remember that the party will be open until Monday night. On Wednesday, I will feature the #1 link that ROCKS (the most viewed). I will also showcase my 3 favorites. And to entice you just a little more, the #1 link that ROCKS will also get to be a guest blogger at a future date (of course only if the winner wants too)...Sounds like fun, right?

October 20, 2011

Guest Blogger: Adrianne from Happy Hour Projects


Remember this Retro Pillow from Happy Hour Projects? 
Well, Today we have Adrianne sharing another fabulous project.  Her pillow was the top viewed link at the third It's A Rockin' Party and therefore she gets to be a guest blogger here...so without further ado, here's Adrianne...take it away girl... 

~.~.~.~.~.~.~.~.~.~.~.~.~.~.~.~.~.~.~.~.~.~.~.~.~.~.~.~.~.~
Hey mamas!  My name is Adrianne and I blog at Happy Hour Projects! 
I started my blog because as a new mom, in addition to being a busy wife, employee, homeowner, dog owner - well, you get the idea - my need for craft-therapy was starting to outweigh the time I have left for myself.  I instituted Happy Hour, where I get to create and play and generally unwind, and I love sharing my projects with all of you!  Most of what I make can be done in an hour or less, or can easily be broken up into one-hour sessions.  I also focus on using what I have, because crafting shouldn't break the bank!
I am so glad to be guest-posting for Carmen today.  Doesn't she have a fabulous blog?  My daughter is quite a bit younger than her crew, and she is the inspiration for a lot of my projects.  So, today's project is indeed baby-friendly, but I'm hoping you all enjoy it anyway!  It's a fantastic scrap-buster, so raid your stash!
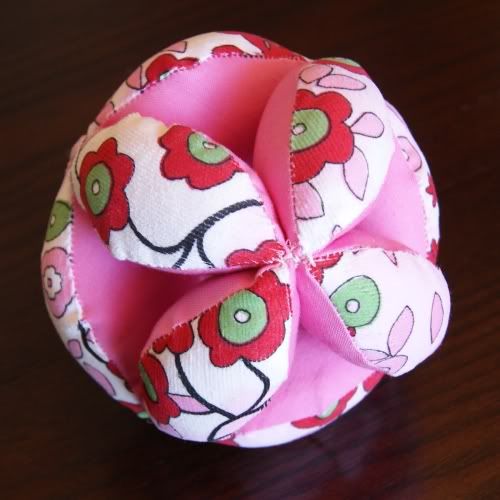
Puzzle Ball
Time: 2-3 hours
Skill Level: Beginner with some experience. 
Techniques involved: Machine Sewing, Stuffing, Hand-stitching.
Supplies:
  • Basic sewing supplies
  • Stuffing - I would recommend Poly-fil.  I used something different this time and didn't like it as well.
  • Fabric - fat-quarter friendly, or a great scrap-buster.  My outer fabric was cut from two scraps that totaled about 8 inches x 16 inches, and you need double that for your inner color.  I used a 4" template which made a ball about 4" in diameter (around the size of a softball).  You could easily use as many other scraps of colors as you like for different looks. 
First of all, let me make one disclaimer: I do quick projects.  I like instant results.  So I found this project to be a little on the tedious side, but it was SO worth the final result.  It wasn't difficult, but it's repetitive and it's a bit heavy on the photos just to be sure I'm explaining myself well. I found that sitting with my family on the couch while football was on was the perfect way to complete the second half of this project.

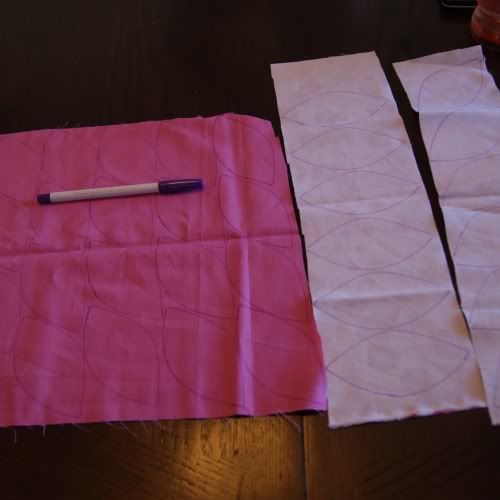
Begin by drawing (or printing) a template to use as your pattern.  I free-handed mine, but I'm sure if you search for marquis shapes, you can find and resize a template to your liking.  Mine was 4" long and 2" wide, which at the end I found to be an ideal size for my daughter.   But, scale up or down as you like!
Trace out your shapes onto the backside of your fabric.  If you want your pattern to be similar to mine, you need 12 pieces of your outer color, which in my case was the floral pattern (which is upside down so you can't tell, sorry), and 24 pieces of your inner color - I used the coordinating pink.
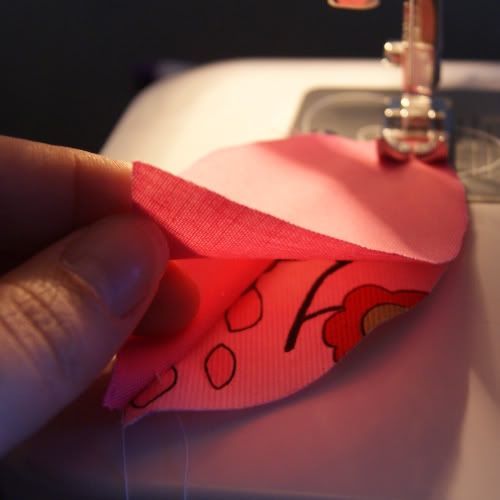
Cut them out.  Then, take one of each pattern and stitch along one side (with the right sides of your fabric facing each other).  I usually use the edge of my presser foot as my guide for my seam allowance.

(One thing I do to save time when I'm doing mass-production type sewing like this, is I don't bother to trim my ends right away.  I just leave them all connected for now, and trim them all up when I'm done!)
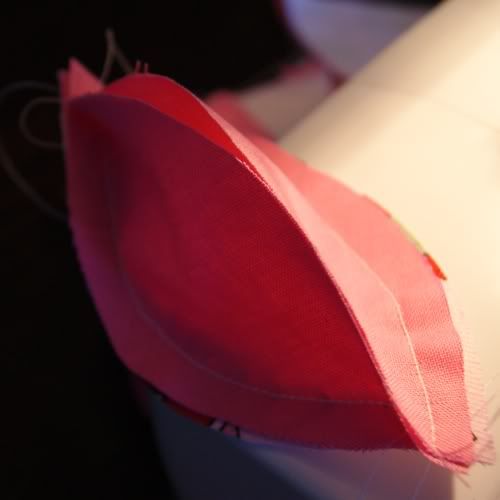
Apparently I got ahead of myself and didn't photograph this step.  I'm going to show you a little later step, because it's the same technique - just ignore that third piece of fabric in this shot.  You'll just be working with two, here.
Once you have 12 segments started and you're out of your outer pieces, turn your string-of-pieces around and start working in the other direction.  (Or, if you have yours finished individually, you can obviously start with any one of them.) Open up the piece at the end.
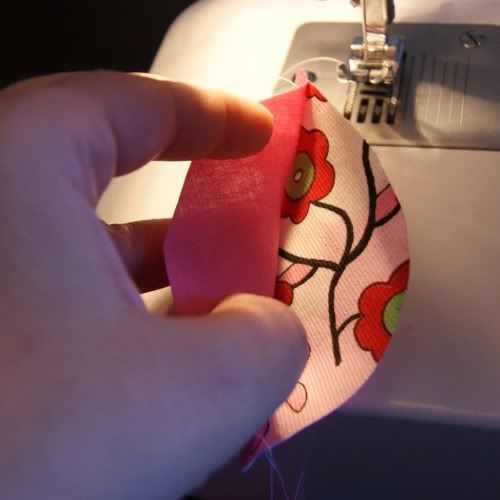
Place your other inner piece along the unstitched edge of your segment.  Now sew it onto this side.   NOW is when you note the third piece of fabric.
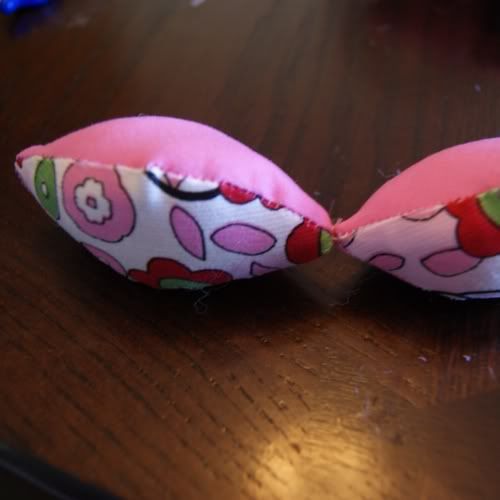
We are making a 3-sided football-shape.  We will be making 12 of them total.

After you get all your inner pieces stitched to your outer pieces, then it's time to close up the open side and stitch your inner pieces to each other.  So prop up the two inner pieces for your three-dimensional shape.
Be sure that when you do your stitching on this step, you are only stitching the two inner pieces together and that your outer piece didn't sneak in.  I found it easiest to fold the floral fabric in half and flatten everything out for stitching.  You will need to leave a hole on this seam for turning and stuffing your pieces.

From working on stuffed animals, I prefer to leave a hole in a place other than a corner.  So, I stitched a short way along the segment, stopped and backstitched, moved an inch down the segment, backstitched again, and finished stitching the rest of the way. 
If you are new to this, and that description is confusing to you, I will elaborate.  (If not, skip on ahead to turning and stuffing.) :) 

Take a good look at the above photo.  I stitched down a short way, you can see it along the top left of the photo.  Then, run a couple stitches on your machine in reverse.  This locks that seam, so that when you turn it inside out and then stuff your segment, your seams don't unravel.  Now move down about an inch (more if you are making bigger segments than these 4" ones) and start again.  Backstitch right away for the same reason.  Then just finish up your side.  This seems a little tedious right now, but I promise, you will be glad you did it when you are hand-stitching it shut later.

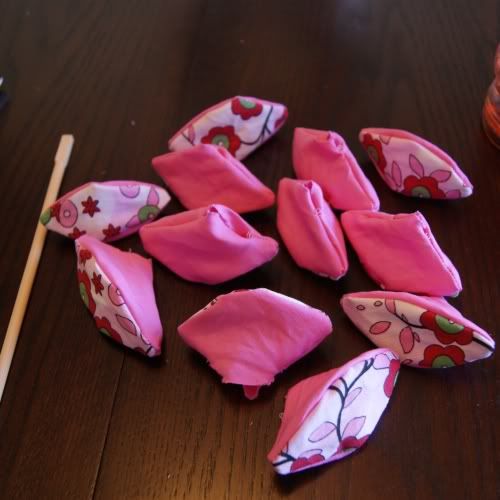
All right.  Now, trim up any threads (and cut your chain-of-segments apart if you did it how I did).  Turn them right-side-out through the hole you left.  I find that a chopstick works well for this.  If you don't have one, a butterknife or knitting needle should work well too.  Resist the urge to use your scissors - you don't want to do all this work only to poke a hole in your fabric. 

Here mine are, looking sad and deflated:
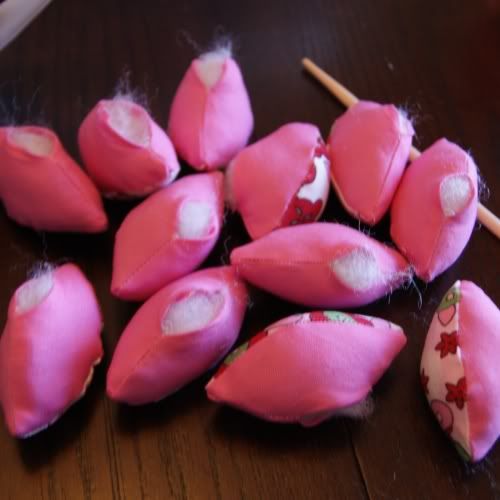
Now, stuff them quite firmly.  They should feel almost hard and not squishy.  This will help your ball retain its round shape.  It will take more stuffing than you think. :)
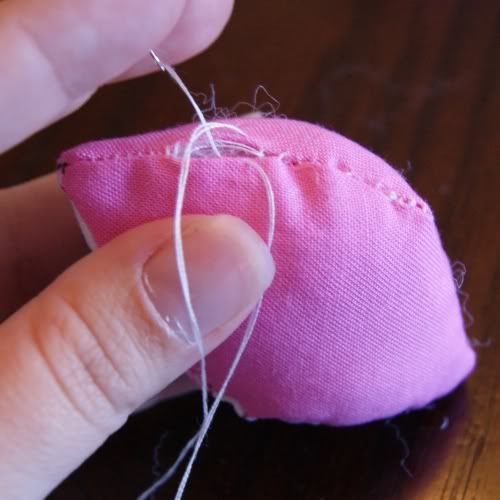
All stuffed?  Now we will be hand-stitching the hole shut.  It's tough for me to photograph this step, but if you don't know how to do it, I would recommend doing a search for a video tutorial on slip-stitching or blind-stitching.  I am actually NOT very good at the hand-stitching, but fortunately, all your seams go on the inside of your ball and won't be visible.

See?  Messyish.  But secure, and that's what counts.
Once you have 12 individual segments, it's time to build the ball.  3 segments will become a ring by stitching them end-to end.  Stitch them as securely as you can.  The smaller your ball is, the more strain will go on these stitches.  Be sure your outer fabric faces to the outside.

Two together:
And add the third to make a ring:
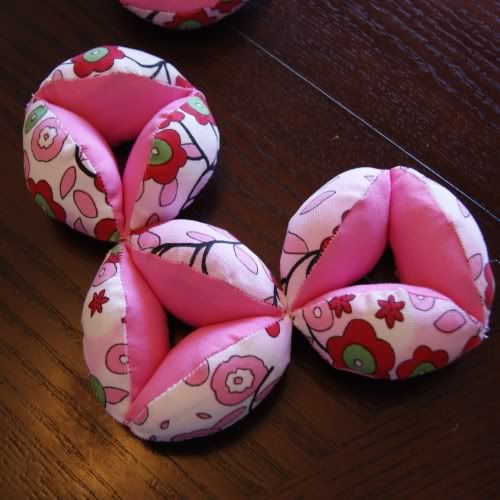
Do that 3 more times, until you have 4 rings of 3 segments each, like these.

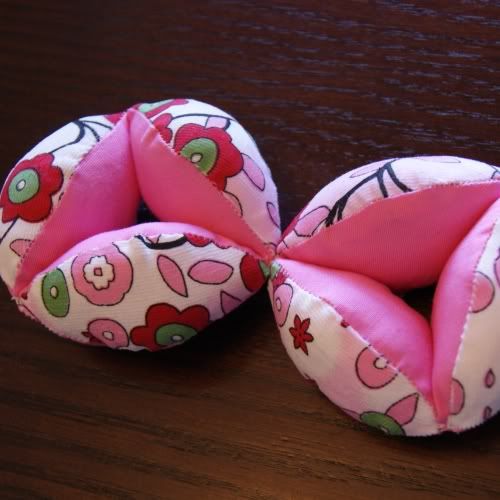
Next, attach two rings together where the segments connect.  Again - strong stitches!
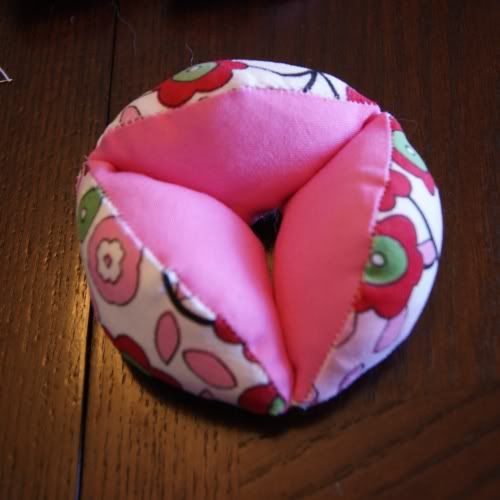
Now attach a third.
Sew the three rings together.  I forgot to photograph this before I sewed the last ring on, so I hope it isn't confusing. This is what happens when you get interrupted fifteen times in five minutes - you mamas know, right?  But see this photograph for the three rings together, and for the placement of that fourth ring.
You should be able to see how all the corners come together by now as you are working, so connecting the rings in this exact order isn't necessary if the pattern makes sense to you as you're working. 
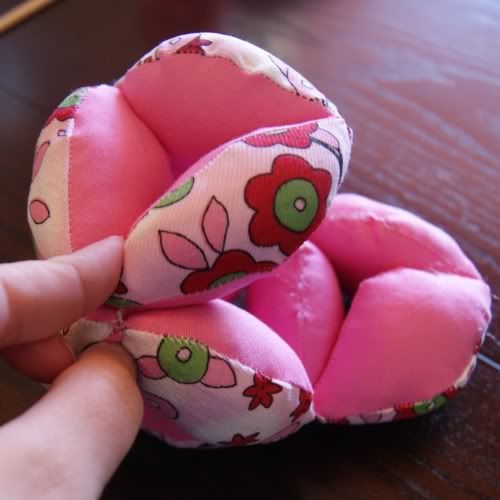
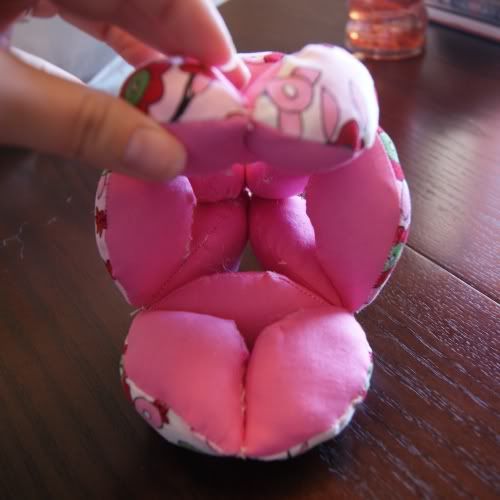
Bring them all closed, and sew them together.
Depending on how your stitching came together, you may want to finish off the corners with a decorative little knot of yarn to cover up your thread stitches, but that's totally optional.  I didn't have any coordinating yarn on-hand, but I may add it later.  I think a little pop of red would look cute!
Now you can give it to your quality control and see what she thinks.
I think she likes it, this is the only shot I could get where it wasn't just a pink blur!

Happy crafting from Happy Hour Projects and Roca & Company! ~ Adrianne

October 18, 2011

You Rock #5 Features

Inch by inch, this party is a cinch! We had 57 superb link-ups last week. All of  you are very creative in very special ways...thanks for all of your inspiration.

Here is the most viewed link-up that ROCKED IT last week....
This Beaded Indian Corn Pin by Lady with the Red Rocker. How cute and fun is this? It it captures the colors of Autumn beautifully... 

My favorite three four (Ha! gotcha!)projects were:

This Popsicle Stick Puzzle by Flip Chick Designs.  So clever. This is a great project for kids big and small...and the picture possibilities are endless...you're just gonna have to check out the tutorial to see why.  

Next is this reversible fall dress that Strictly Homemade sewed for her baby girl.  
I can't decide which side I like the best...both are adorable!


 Melanie Ham Designs made this Anthropologie bracelet knock-off. Sophisticated. Stylish. Chic. Classy. Nuff said.

And last, is this DIY Pallet Headboard by The Rooster and the Hen. I am totally speechless.  This headboard is gorgeous and just what I need in my master bedroom...um, hunny, I need to borrow the truck, gonna pick up some pallets...
(This headboard was linked up 13 minutes before the closing of the party...
just goes to show you, it's never too late to link-up!)


So there you have it...5 brilliant projects from 5 very different crafters.  Thank you to all who linked up last week...make sure to come back this coming Friday so we can continue to Make and Create together. If your project was featured, make sure to grab your button.


<div align="center"><a href="http://www.rocaandcompany.blogspot.com" title="roca and company"><img src="http://i55.tinypic.com/309lhg8.jpg" alt="roca and company" style="border:none;" /></a></div>


Related Posts Plugin for WordPress, Blogger...