November 22, 2011

You ROCK #10 Features

I know that most of you are super busy right now preparing for your Thanksgiving feast, so I'll make this super quick...This week we had 79 super awesome link ups...Yes! So, thanks for taking a moment from your busy day to link up here at RoCa every Friday.  Also, remember that there is NO link party this coming Friday... so see you December 2nd...

So, here is the most viewed link-up that ROCKED IT last week....
Question, what does a short sleeved shirt + too big tights = ?  
A way too cute shirt redo that Keeping it Simple made for her little girl on her 1st birthday...such a sweet way to remember such a day. Check out the tutorial and see what else she did with the tights...clever.


This week, I'm breaking the rules again...here are My favorite three projects were in no particular order:

These hand painted chicken towels by Backwoods Cottage are so country chic....

 Tom Turkey looks so cute as a bow!  I "Shir" Can Craft! did a great job....

Made in a Day shows you how to make this fun and easy swirly scarf...

The House of Bledsoe made these hand and footprint turkeys with her sons...

This table runner by Randee's Organized Chaos is fabulous and easy to make... 

So there you have it...6 terrific projects from 6 very different crafters.  Thank you to all who linked up last week...make sure to come back this coming Friday, December 2nd so we can continue to Make and Create together. If your project was featured, make sure to grab your button.


<div align="center"><a href="http://www.rocaandcompany.blogspot.com" title="roca and company"><img src="http://i55.tinypic.com/309lhg8.jpg" alt="roca and company" style="border:none;" /></a></div>

November 17, 2011

You Rock #10


When I found this quote on Pinterest, it made me smile.  This year has been very hard for me and my family in every aspect of the word...just plain hard.  But, as hard as it has been, my God has NEVER left our side. My husband, kids and I are ever to thankful for God's blessing over our lives.
~.~.~.~.~.~.~.~.~.~.~.~
I hope that you have a very Thankful time with your families and friends next week...and take a moment to thank the ultimate Maker and Creator...
~.~.~.~.~.~.~.~.~.~.~.~.~.~.~.~.~.~.~.~.~.~.~.~.~.~.~.~.~.~.~.~.~.~.~
Some quick thoughts before we link up...
~features for this party will be on Tuesday instead of Wednesday     
~no guest blogger next week (Thursday)
~no party next week (Friday)
~new "rule"...if you want to be in the running to be featured, you must link back somewhere on your blog; the easiest way is to grab our button at the bottom of this post, that's it. Just paste it somewhere on your blog: link party page, sidebar, within your post, etc.  Now, you don't have too in order to link up, but if I'm going to feature your work, the least you can do is link back.
~.~.~.~.~.~.~.~.~.~.~.~.~.~.~.~.~.~.~.~.~.~.~.~.~.~.~.~.~.~.~.~.~.~.~
So, are you ready to ROCK IT?!
Here are the very simple to follow rules:
1. Link up something that YOU made: sewing, craft, recipe, anything that you would like to share, etc…
2. Link up to the specific post; not your blog.
3. No linking giveaways or items for sale.
4. Visit and comment/encourage at least one fellow blogger friend.
5. Grab this button and post on your blog or post...just somewhere where others can come and link up as well. This is also a must if you want to be featured. 


<div align="center"><a href="http://www.rocaandcompany.blogspot.com" title="rocaandcompany"><img src="http://i52.tinypic.com/u3mky.jpg" alt="rocaandcompany" style="border:none;" /></a></div>

 And just a simple request, it's optional, only if you want, I'm not gonna make you, BUT it would be nice if you would follow RoCa and Company
So you ready to Party?! Let's ROCK this place!
Also, remember that the party will be open until Monday night. On Wednesday, I will feature the #1 link that ROCKS (the most viewed). I will also showcase my 3 favorites. And to entice you just a little more, the #1 link that ROCKS will also get to be a guest blogger at a future date (of course only if the winner wants too)...Sounds like fun, right?

November 16, 2011

You Rock #9 Features

Here's a huge shout out to all 68 of your link ups! You all just keep "up one-ing" the previous week's party.  Every single post was super creative in every way...thank you, thank you, thank you to all who linked up and shared your incredible inspiration with us.

So, here is the most viewed link-up that ROCKED IT last week....
This ever so easy fabric flower headband tutorial
by Precious Little Poppets. These would look very pretty in any color or pattern and did I mention that they are super easy to make?Seriously, check it out...and you are so very welcome...I just added another project to your "to craft list". 

My favorite three projects were:

This snuggle pet bed by Modesty Matters.  This bed is so cute and practical. I just got to figure out how to make it for my aging 60 pound lab mix...the mini winnie is not a problem at all.  Both dogs will love us even more once I finish their beds. 


Next are these mini chocolate peppermint pancakes that Inspired by Family made.  Chocolate + Peppermint + Pancakes + MINI = a guilt free"I-can-have-one-more-if-I-want-to-kinda" attitude because, well, these yummy delights are MINI sized.  

And last is this great recipe for play dough by  Sew Fantastic.  This is the perfect thing to make for all the kids on Thanksgiving Day...or any day for that matter...a kid can never have enough play dough.

So there you have it...4 terrific projects from 4 very different crafters.  Thank you to all who linked up last week...make sure to come back this coming Friday so we can continue to Make and Create together. If your project was featured, make sure to grab your button.


<div align="center"><a href="http://www.rocaandcompany.blogspot.com" title="roca and company"><img src="http://i55.tinypic.com/309lhg8.jpg" alt="roca and company" style="border:none;" /></a></div>

November 13, 2011

Bella Nube Rose Tutorial

My sister knows me all too well. I made this... 
out of this.
My sister bought/sent Sam a silk lined wool skirt that she found at a thrift store. She knew I could "fix" it for Sam...and I did.  I threw it in the wash and dryer. Bingo! The skirt shrank so much that it fits Sam perfect now.  The lining is a different story.  
It didn't shrink as much.  So I cut it off the skirt.
I used half of the lining and cut up different sized squares...
cut these square in to random "cloud" shaped circles...
stacked them up by size...
and sewed each "cluster" right in the middle...just a couple of stitches, back and forth ...just enough to hold the "cluster" together...except for the last and smallest "cluster".
To the "cluster" that I didn't sew together, I hand-sewed on some beads...just random.  Then I hot glued it all together from the largest "cluster" to the smallest...added a pin to the back with hot glue...
and done...a beautiful cloud rose pin...
no matter the weather...
Bella Nube is Italian for Beautiful Cloud...and the darkening clouds tonight are definitely beautiful.  They hold an 80% chance of rain tonight and tomorrow...which is a very good thing for a drought stricken central Texas.

November 10, 2011

You ROCK #9

Sam had the neatest home project to work on this past weekend. It was to disguise a "turkey" so that it doesn't get eaten for Thanksgiving.  Sam decided to disguise her turkey as a ballerina cow. She drew and colored black spots...
 I helped Sam make the ballerina outfit and cow "mask".  
Once done, she glued it all together...
and this once "turkey" is now a prancing ballerina cow...
Can't wait for Sam to bring it home so we can frame it...
~.~.~.~.~.~.~.~.~.~.~.~.~.~.~.~.~.~.~.~.~.~.~.~.~.~.~.~.~.~.~.~.~.~.~
So, are you ready to ROCK IT?!
Here are the very simple to follow rules:
1. Link up something that YOU made: sewing, craft, recipe, anything that you would like to share, etc…
2. Link up to the specific post; not your blog.
3. No linking giveaways or items for sale.
4. Visit and comment/encourage at least one fellow blogger friend.
5. Grab this button and post on your blog or post...just somewhere where others can come and link up as well.


<div align="center"><a href="http://www.rocaandcompany.blogspot.com" title="rocaandcompany"><img src="http://i52.tinypic.com/u3mky.jpg" alt="rocaandcompany" style="border:none;" /></a></div>
 And just a simple request, it's optional, only if you want, I'm not gonna make you, BUT it would be nice if you would follow RoCa and Company.
So you ready to Party?! Let's ROCK this place!
Also, remember that the party will be open until Monday night. On Wednesday, I will feature the #1 link that ROCKS (the most viewed). I will also showcase my 3 favorites. And to entice you just a little more, the #1 link that ROCKS will also get to be a guest blogger at a future date (of course only if the winner wants too)...Sounds like fun, right?

Guest Blogger: Jessica from A Couple of Craft Addicts

Remember this cute dress by A Couple of Craft Addicts?  
Well, today we have Jessica sharing another cute and colorful dress tutorial. Her dress was the top viewed link two weeks ago at It's A Rockin' Party and therefore she gets to be a guest blogger today...so without further ado, here's Jessica...
~.~.~.~.~.~.~.~.~.~.~.~.~.~.~.~.~.~.~.~.~.~.~.~.~.~.~.~.~.~.~
This dress was inspired by my dear friend and co-blogger Heather. Her necklace onesie is the most viewed item on our blog. I loved the idea so I decided to apply it to a dress for Elizabeth. 

I made a tutorial for this dress but I want to add a disclaimer. Here is some background...I have only been sewing for about 2 years and making my own patterns for about 3 months. I have never taken a sewing class. Most of the time I make it work and it is not always the "correct" way. But that is how we learn, by trying something new. So with that in mind here is the tutorial.

Materials: for a 2T
1/2 yard of material for the top and sleeves. I used satin stretch cotton.
a piece of fabric measuring 16"widex44"long for the skirt (add about 1 inch to the length for each additional size)
2 strips of fabric for the sash measuring about 4"x44" wide (this is just a base, I cut it down to adjust the length which I will talk about later
medium ric rac
large ric rac
fabric paint
a pencil
two small buttons for the front and 3 larger buttons for the back

The process:
1. We are going to work on the bodice first. You will need a fitted t-shirt and some tissue or medical paper for the pattern. Create a basic a-line pattern using your t-shirt.

Then cut about 2 inches under the arm.
Now you are going to use this to cut out your bodice. You need to cut 2 of the sleeve on the fold and 2 of the top (one for the front and one for the lining). Then you are going to use the same pattern piece to cut the back but this time you need to add about 1 inch starting from the middle to aid in the overlap for the buttons. Cut 2 (one for the back and one for the lining". Cut these on the selvage (the raw edge).


Here are your pieces.2. Now we will put it together. Start by sewing the front piece and the back piece together at the shoulders with right sides together. Repeat with the lining pieces.
Here is what the pieces will look like laid out. I like to press the seams open for a flat and clean look. Now you are going to lay the lining on top of the outside pieces with right sides together. Pin and sew down the middle of the back, and around the neckline.Now clip around the curves for an easy flip. Then flip the bodice right side out.
Finally you are going to sew the sides together. You need to match up the right sides together on the outside pieces. Then match the right sides together of the lining. Now you have a bodice.
3. The sleeves are next. I started by creating a cuff to the end of the sleeve. Fold the end up 1/4 inch and then another 1/4 inch and press. I wanted to add some medium ric rac peeking out under the cuff so I pinned it to the inside and sewed it down.


Then with the right sides together sew the sleeves together up the side. Then flip right side out.
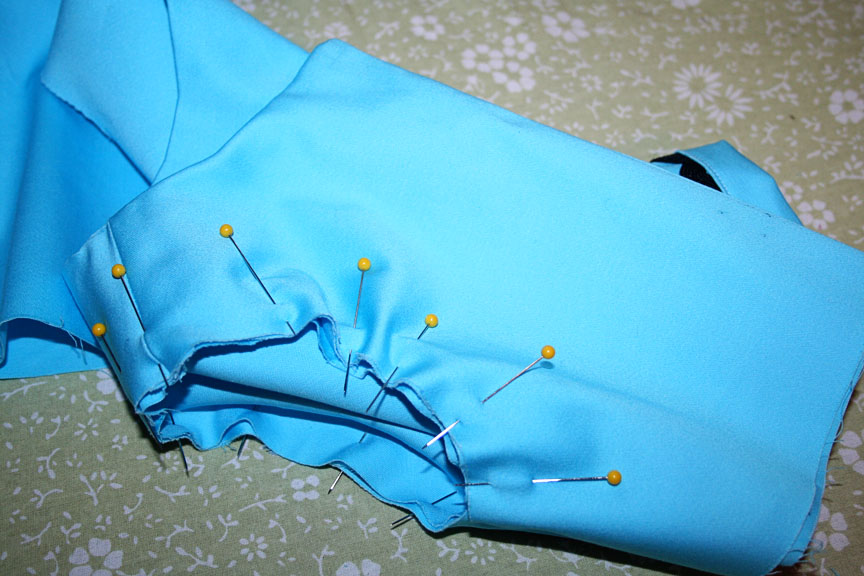
4. Next we will set in the sleeve. Turn your bodice inside out and stick the sleeve through the arm hole right sides together. Pin it in place and use A LOT of pins. I like to start at the top middle of the sleeve and pin it to the shoulder at the seam. Then pin the bottom matching seam to seam. Now finish pinning all around the sleeve.
Sew it in place. Flip it right side out and repeat with the other side.

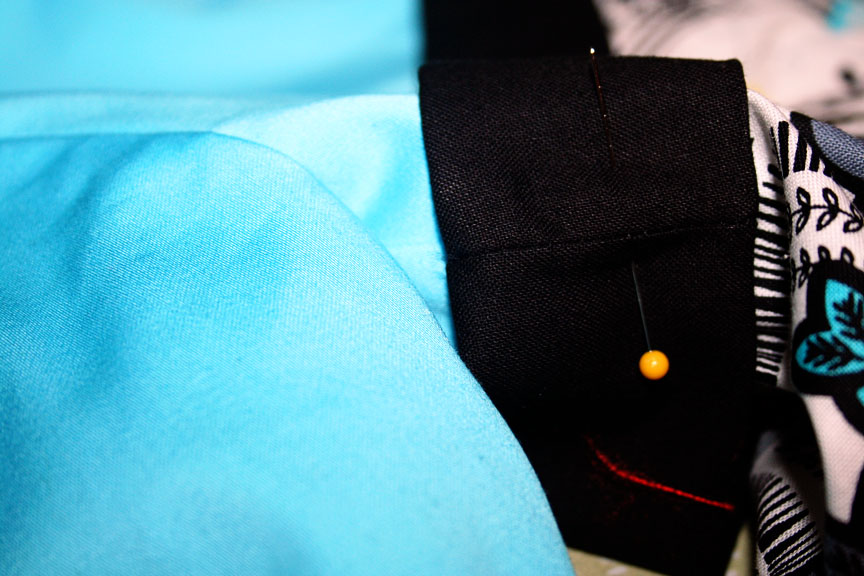
Finally you are going to create your button holes in the back.
5. Now we will work on the skirt portion. Start by creating a hem by folding the bottom under 1/4 inch and another 1/4 inch. Press and sew down.
Next I added large ric rac to the front of the skirt along the hem line.
Now using a long stitch sew a line along the top of the skirt about 1/4 inch from the edge and leave the ends long for synching. Now sew another line next to the first line.
Pull on the tread ends to gather the skirt. Gather until it matches up with the bodice length but leave about 1/4 inch of skirt on each side for your skirt seam. Pin to the bodice and sew in place.Now sew the back of the skirt together.
You will have to overlap the top of the skirt where I meets the bodice because the bodice overlaps for the buttons. I just make an extra gather at that part and sew it in place. (Don't worry your sash will cover up any oddities). 6. Now you are going to make the sash. Sew your two sash strips together to make a long strip. To get the correct length measure around the front of the dress and then the back tying it in a bow (I like to put the seam in the side seam of the dress so you can't see it). Now you can gauge the length you need based on your bodice and desired bow size.
Now fold your strip in half right sides together and press. Then sew your strip together starting at one end and down the length. (Do not sew up the end or you won't be able to flip it back over.)
Using a wooden spoon flip the sash back to the right side.
Fold the edges of the open end inside and blind stitch or top stitch the end closed.
Now attach your sash to your dress at the side seams, matching up the seam in the sash with one of your side seams. YOUR ALMOST DONE!
7. Now for the fun embellishments. Either by hand or using a stencil draw a collar line on the top front of the dress. I just did it free hand (it doesn't have to be perfect.)
Now take your pencil and dip the eraser end in fabric paint. Then make dots along your line dipping the pencil in the paint every other dot. (I would practice a little on a scrap of your fabric to make sure the color, size, and textures work.)

Now add your small buttons to the front and back.

My daughter loves it so much she refused to take it off before bed.

Related Posts Plugin for WordPress, Blogger...