Remember this Retro Pillow from Happy Hour Projects?
Well, Today we have Adrianne sharing another fabulous project. Her pillow was the top viewed link at the third It's A Rockin' Party and therefore she gets to be a guest blogger here...so without further ado, here's Adrianne...take it away girl...
~.~.~.~.~.~.~.~.~.~.~.~.~.~.~.~.~.~.~.~.~.~.~.~.~.~.~.~.~.~
Hey mamas! My name is Adrianne and I blog at Happy Hour Projects!
I started my blog because as a new mom, in addition to being a busy wife, employee, homeowner, dog owner - well, you get the idea - my need for craft-therapy was starting to outweigh the time I have left for myself. I instituted Happy Hour, where I get to create and play and generally unwind, and I love sharing my projects with all of you! Most of what I make can be done in an hour or less, or can easily be broken up into one-hour sessions. I also focus on using what I have, because crafting shouldn't break the bank!
I am so glad to be guest-posting for Carmen today. Doesn't she have a fabulous blog? My daughter is quite a bit younger than her crew, and she is the inspiration for a lot of my projects. So, today's project is indeed baby-friendly, but I'm hoping you all enjoy it anyway! It's a fantastic scrap-buster, so raid your stash!
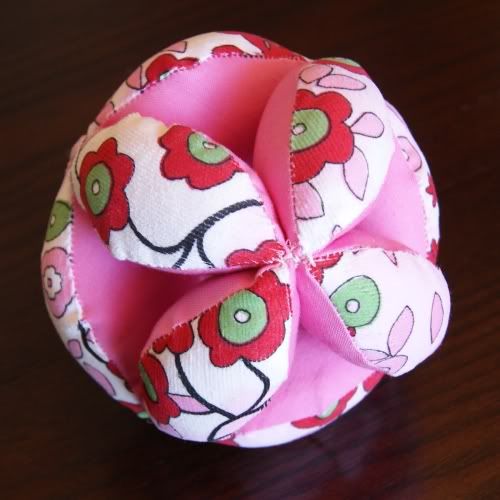
Puzzle Ball
Time: 2-3 hours
Skill Level: Beginner with some experience.
Techniques involved: Machine Sewing, Stuffing, Hand-stitching.
Supplies:
- Basic sewing supplies
- Stuffing - I would recommend Poly-fil. I used something different this time and didn't like it as well.
- Fabric - fat-quarter friendly, or a great scrap-buster. My outer fabric was cut from two scraps that totaled about 8 inches x 16 inches, and you need double that for your inner color. I used a 4" template which made a ball about 4" in diameter (around the size of a softball). You could easily use as many other scraps of colors as you like for different looks.
First of all, let me make one disclaimer: I do quick projects. I like instant results. So I found this project to be a little on the tedious side, but it was SO worth the final result. It wasn't difficult, but it's repetitive and it's a bit heavy on the photos just to be sure I'm explaining myself well. I found that sitting with my family on the couch while football was on was the perfect way to complete the second half of this project.
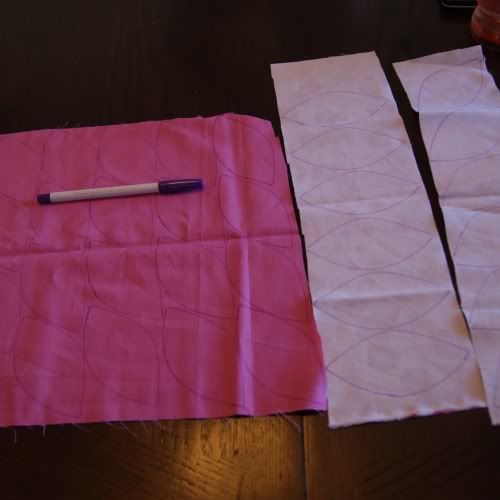
Begin by drawing (or printing) a template to use as your pattern. I free-handed mine, but I'm sure if you search for marquis shapes, you can find and resize a template to your liking. Mine was 4" long and 2" wide, which at the end I found to be an ideal size for my daughter. But, scale up or down as you like!
Trace out your shapes onto the backside of your fabric. If you want your pattern to be similar to mine, you need 12 pieces of your outer color, which in my case was the floral pattern (which is upside down so you can't tell, sorry), and 24 pieces of your inner color - I used the coordinating pink.
Cut them out. Then, take one of each pattern and stitch along one side (with the right sides of your fabric facing each other). I usually use the edge of my presser foot as my guide for my seam allowance.
(One thing I do to save time when I'm doing mass-production type sewing like this, is I don't bother to trim my ends right away. I just leave them all connected for now, and trim them all up when I'm done!)
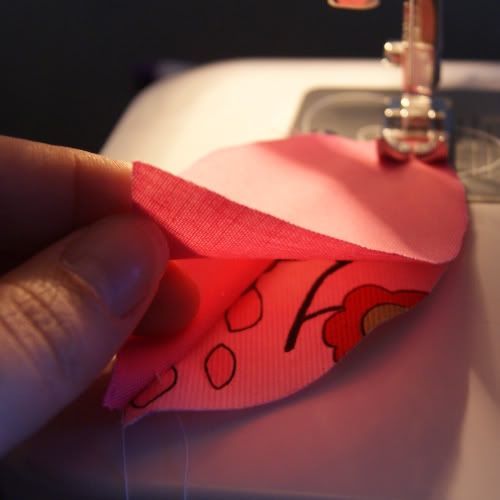
Apparently I got ahead of myself and didn't photograph this step. I'm going to show you a little later step, because it's the same technique - just ignore that third piece of fabric in this shot. You'll just be working with two, here.
Once you have 12 segments started and you're out of your outer pieces, turn your string-of-pieces around and start working in the other direction. (Or, if you have yours finished individually, you can obviously start with any one of them.) Open up the piece at the end.
Place your other inner piece along the unstitched edge of your segment. Now sew it onto this side. NOW is when you note the third piece of fabric.
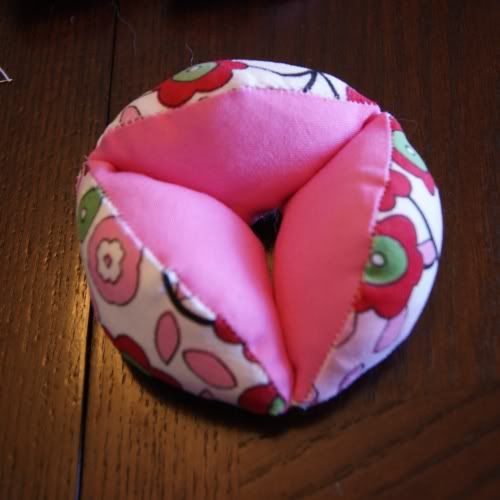
We are making a 3-sided football-shape. We will be making 12 of them total.
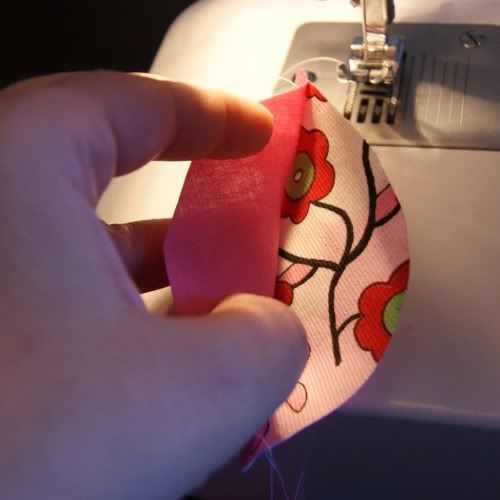
After you get all your inner pieces stitched to your outer pieces, then it's time to close up the open side and stitch your inner pieces to each other. So prop up the two inner pieces for your three-dimensional shape.
Be sure that when you do your stitching on this step, you are only stitching the two inner pieces together and that your outer piece didn't sneak in. I found it easiest to fold the floral fabric in half and flatten everything out for stitching. You will need to leave a hole on this seam for turning and stuffing your pieces.
From working on stuffed animals, I prefer to leave a hole in a place other than a corner. So, I stitched a short way along the segment, stopped and backstitched, moved an inch down the segment, backstitched again, and finished stitching the rest of the way.
If you are new to this, and that description is confusing to you, I will elaborate. (If not, skip on ahead to turning and stuffing.) :)
Take a good look at the above photo. I stitched down a short way, you can see it along the top left of the photo. Then, run a couple stitches on your machine in reverse. This locks that seam, so that when you turn it inside out and then stuff your segment, your seams don't unravel. Now move down about an inch (more if you are making bigger segments than these 4" ones) and start again. Backstitch right away for the same reason. Then just finish up your side. This seems a little tedious right now, but I promise, you will be glad you did it when you are hand-stitching it shut later.
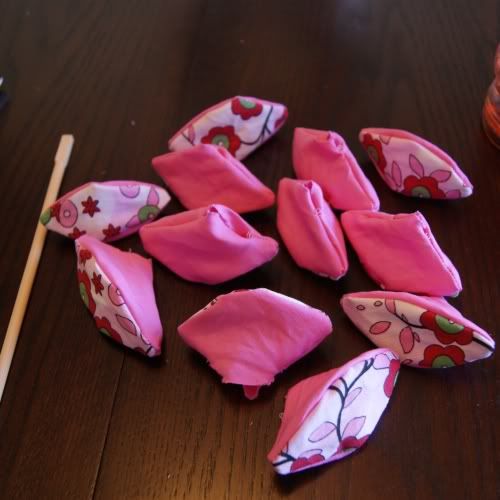
All right. Now, trim up any threads (and cut your chain-of-segments apart if you did it how I did). Turn them right-side-out through the hole you left. I find that a chopstick works well for this. If you don't have one, a butterknife or knitting needle should work well too. Resist the urge to use your scissors - you don't want to do all this work only to poke a hole in your fabric.
Here mine are, looking sad and deflated:
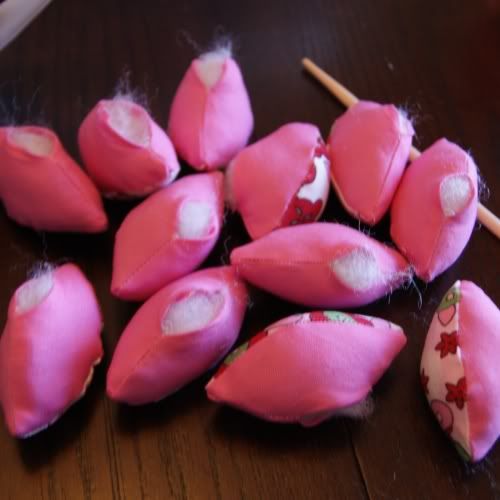
Now, stuff them quite firmly. They should feel almost hard and not squishy. This will help your ball retain its round shape. It will take more stuffing than you think. :)
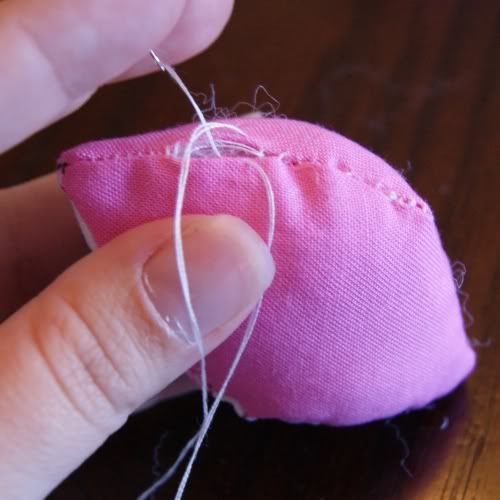
All stuffed? Now we will be hand-stitching the hole shut. It's tough for me to photograph this step, but if you don't know how to do it, I would recommend doing a search for a video tutorial on slip-stitching or blind-stitching. I am actually NOT very good at the hand-stitching, but fortunately, all your seams go on the inside of your ball and won't be visible.
See? Messyish. But secure, and that's what counts.
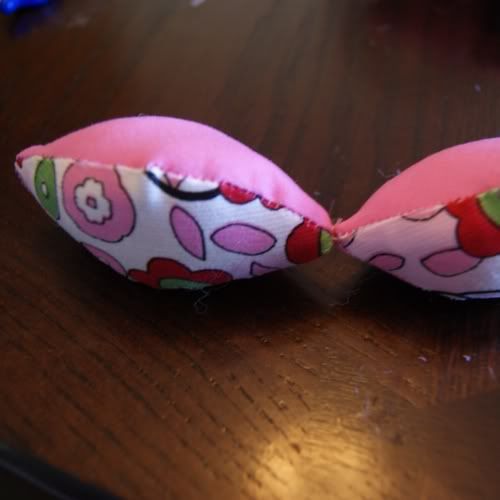
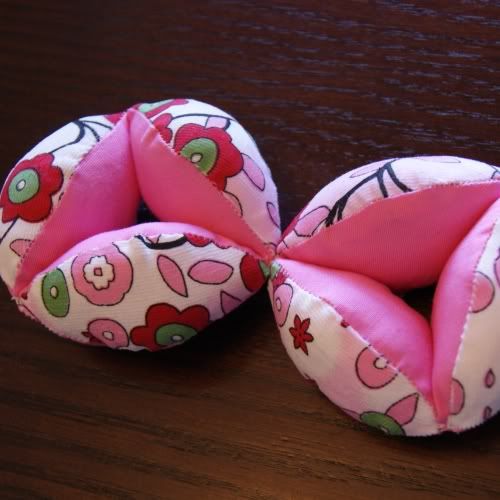
Once you have 12 individual segments, it's time to build the ball. 3 segments will become a ring by stitching them end-to end. Stitch them as securely as you can. The smaller your ball is, the more strain will go on these stitches. Be sure your outer fabric faces to the outside.
Two together:
And add the third to make a ring:
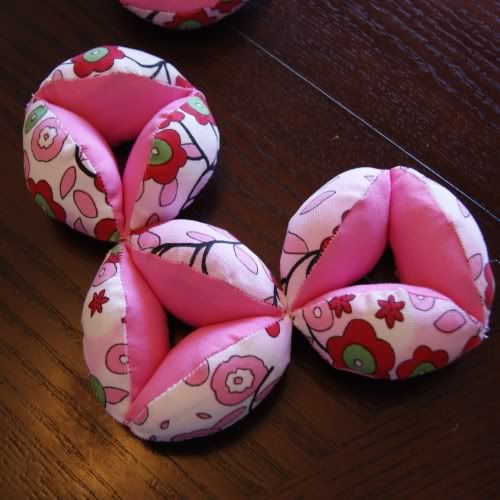
Do that 3 more times, until you have 4 rings of 3 segments each, like these.
Next, attach two rings together where the segments connect. Again - strong stitches!
Now attach a third.
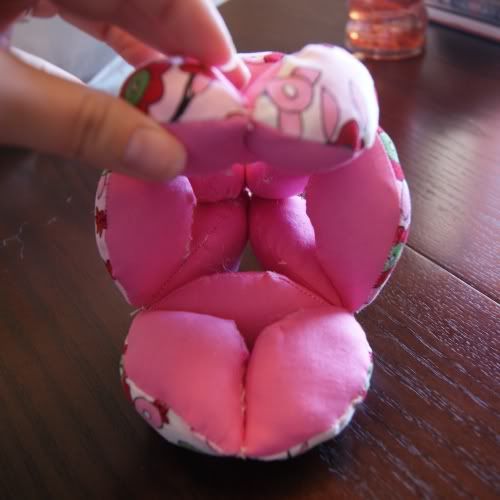
Sew the three rings together. I forgot to photograph this before I sewed the last ring on, so I hope it isn't confusing. This is what happens when you get interrupted fifteen times in five minutes - you mamas know, right? But see this photograph for the three rings together, and for the placement of that fourth ring.
You should be able to see how all the corners come together by now as you are working, so connecting the rings in this exact order isn't necessary if the pattern makes sense to you as you're working.
Bring them all closed, and sew them together.
Depending on how your stitching came together, you may want to finish off the corners with a decorative little knot of yarn to cover up your thread stitches, but that's totally optional. I didn't have any coordinating yarn on-hand, but I may add it later. I think a little pop of red would look cute!
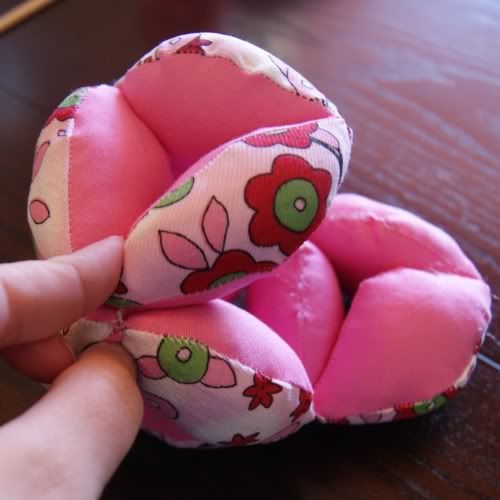
Now you can give it to your quality control and see what she thinks.
I think she likes it, this is the only shot I could get where it wasn't just a pink blur!
Happy crafting from Happy Hour Projects and Roca & Company! ~ Adrianne


2 comments:
Fabulous step-by-step tutorial. I always need good photos and lots of explanations like this. Also, thanks for the tip on not clipping the threads one by one,...that's smart.
Hello mate nicce blog
Post a Comment