April 29, 2011

Sorry for missing in action...

Just wanted to pop in and apologize for missing in action for the past last two weeks.  I've had technical issues with my computer and a lost camera.  They are to blame but all is well with the world now.  In the mean time, enjoy these random pictures my kids took during the time the camera was "lost". 


I will be back on Monday ready to share what I've been up to...it's gonna be good.  Thanks for checking in...

April 18, 2011

Faux Chenille Capri Pants

The weather in Texas is getting pretty warm hot so making my kids wear pants to school is just down right mean…at least that is what my kids say.  So in order for me not to be a “meanie”, I have cut and refashioned  most, if not all of their jeans into suitable attire for the Texas heat. 

For this tutorial, I have applied the concept of faux chenille to a pair of my daughter's jeans. For a quick tutorial on the faux chenille concept, I refer you to Dana from Made (here). Although the tutorial that Dana has is for a baby blanket, the concept of sewing lines and then cutting them "open" is the same for these jeans. 
  

These are two pairs of jeans that were recently cut.  The pair on the top was cut above the knee and then hemmed using a zigzag stitch.  I used gold thread to match the gold thread in the cute floral embroidery. Now, see how the pair on the bottom is just, well, just plain and simple. I took it from plain to WOW...much better. 


So let’s jump right into a simple and easy way to spruce up your jeans, or capri pants or shorts or skirts…anything really. First, cut your pant legs a little above the knee. 


Now look at the inner and outer seams. You want to use a seam ripper to open the seam that does not have the double stitching on the outside.  If I lost you, just look for the seam that looks like this picture...


and rip open that seam.  Since my seam was on the outside, I opened it up to the pockets. 


If your seam is inside, then open right before the crotch. This piece of the pants will be referred to Part A.  Now, do the same for the pant legs you cut off. This leg piece will be referred to Part B. 


(I used scissors to cut open the pant legs because the legs were flared giving me more material to work with.)
  

Then place Part A (wrong side up) flat on a table, first.  Place Part B (wrong side up) overlapping Part A. The seam ripper is touching Part A. Don't worry if the seams don't line up.  Trust me, it won't matter in the end. You want to make sure that the pieces overlap each other at least 8 inches.  Pin these two pieces together; just enough to hold it together to get it to your sewing machine. 


Now just sew straight lines about an inch apart making sure to sew both pieces together. I sewed several straight lines and then went back and did a zigzag stitch just for decoration but you can skip this part.   


Once you are done stitching, VERY CAREFULLY, cut a straight line between two rows of stitch making sure to ONLY cut the TOP layer of your pant leg. 


Now match up your hem lines...


 and starting at the hem, pin up the sides and sew your pant leg closed.  (I also finished off the inseam with a zigzag stitch and it's up to you if you want to skip this step.)  It is easier to make adjustments when sewing up from the hem than having your hems not match up if you start from the top and work down.


Just follow the previous stitching that you picked out earlier.  Don’t worry if the stitching doesn't line up, it won’t matter once the pants are done.  What is important is for the hems to match up. Trust me.


One leg down…one to go. 


Repeat the same for the other leg making sure to measure the finished leg against the 
unfinished one to get the correct length on both legs. 


Once both legs are finished...


wash the pants...and trim off the frayed hairy mess.  Below, the top leg is a frayed mess while the bottom leg is well groomed and trimmed.  And the added bonus to this is that you don't have to hem the bottom!


Here is the final, finished and polished capri pants.  
See how even though the fraying doesn't line up, the pants still look hip and fashionable. 


Back view 


Fray goodness....


I hope that all this is clear as mud to you.  If you have ANY questions, just email me and I will try to answer as best as I can.  Also, I would love to see pictures of your refashioned jeans using this tutorial. 

Thanks, Carmen

April 14, 2011

What Makes a 5 Year Old Happy?


Glow In The Dark Stars!!  My husband and I have been redoing/redecorating our son's room.  Part of the redo was to hang glow in the dark stars from the ceiling.  It is very simple to do.


Here is what you need:


Here is what you do.  Carefully heat the end of the straight pin with the flame of the lighted tea light candle.  Then, poke two holes (at opposite ends) on the stars.  


Because burnt plastic smells awful, make sure you work in a well ventilated area.  Once you finish making all the holes on all the stars, string them up with the fishing wire.  Stringing them up is easy.  Get one star, insert wire into one hole and then out the other.  Continue until you are done with all the stars.  Now the fun part...hang them up!!  I just used the same hooks that were used to hand the airplanes.  You can use hooks, clear tape or even thumb tacks. 


Here is a night view of the glow-y stars. 


Our son L.O.V.E.D. I.T.!  I don't think he got much sleep last night.  I heard him close his door and turn on and off the ceiling light several times.  I can only assume that he was recharging the stars all night long.  I plan on filling in the other side of his room with more hanging stars.


April 13, 2011

"Don't Quit..."


Many times I have felt like this child pianist. I am grateful that I have heard the small whisper in my ear telling me, "Don't quit.  Keep playing."  Please visit the Livesay [Haiti] Weblog.  The following came from their blog this morning.  Pray for them as they continue to help the less fortunate in Haiti.  

THE PIANO


Wishing to encourage her young son's progress on the piano, a mother took her boy to a Paderewski concert. After they were seated, the mother spotted a friend in the audience and walked down the aisle to greet her. Seizing the opportunity to explore the wonders of the concert hall, the little boy rose and eventually explored his way through a door marked "NO ADMITTANCE.

When the houselights dimmed and the concert was about to begin, the mother returned to her seat and discovered that the child was missing. Suddenly, the curtains parted and spotlights focused on the impressive Steinway on stage. In horror, the mother saw her little boy sitting at the keyboard, innocently picking out "Twinkle, Twinkle Little Star." At that moment, the great piano master made his entrance, quickly moved to the piano, and whispered in the boy's ear, "Don't quit. Keep playing."

Then leaning over, Paderewski reached down with his left hand and began filling in a bass part. Soon his right arm reached around to the other side of the child and he added a running obligatio. Together, the old master and the young novice transformed a frightening situation into a wonderfully creative experience. And the audience was mesmerized.

Whatever our situation in life and history--however outrageous, however desperate, whatever dry spell of the spirit, whatever dark night of the soul-- God is whispering deep within our beings, "Don't quit. Keep playing. You are not alone, Together we will transform the broken patterns into a masterwork of my creative art. Together, we will mesmerize the world with our song of peace.


 © E. Elliot 1997

April 12, 2011

Happy Birthday, Ms. Janet!


Today is Ms. Janet's birthday. Ms. Janet is my son's pre-K teacher and she is the most loving, giving, patient, and fab teacher I know.

When I told my son, over the weekend, that Ms. Janet was going to have a birthday on Tuesday, he was super excited and wanted to MAKE Ms. Janet something special.  Notice how I typed "make".  He didn't want to "buy" or "get"; he wanted to MAKE something special for his teacher.  Ahhhh... I have taught them (he and his sister) well.  

A little over a year ago, we implemented a NO BUY policy for gifts.  Any gift we give, whether it's for a birthday, wedding, baby shower...just any gift is MADE by me or the kids or by both. Usually, if I make or sew something, the kids will make the wrapping paper (freezer paper/crayons/markers) and wrap the gift.  

So my son dictated his vision of the perfect gift for Ms. Janet.  First, he wanted me to paint Ms. Janet a t-shirt with a freezer paper stencil of a flower.  Then, he wanted me to sew a matching skirt to go with the t-shirt and he even pulled out a nice fabric from my stash. Last, he added to this ambitious gift giving list a small handmade pillow so Ms. Janet "can put her tooth in and the tooth fairy can give her money".  Um....huh?

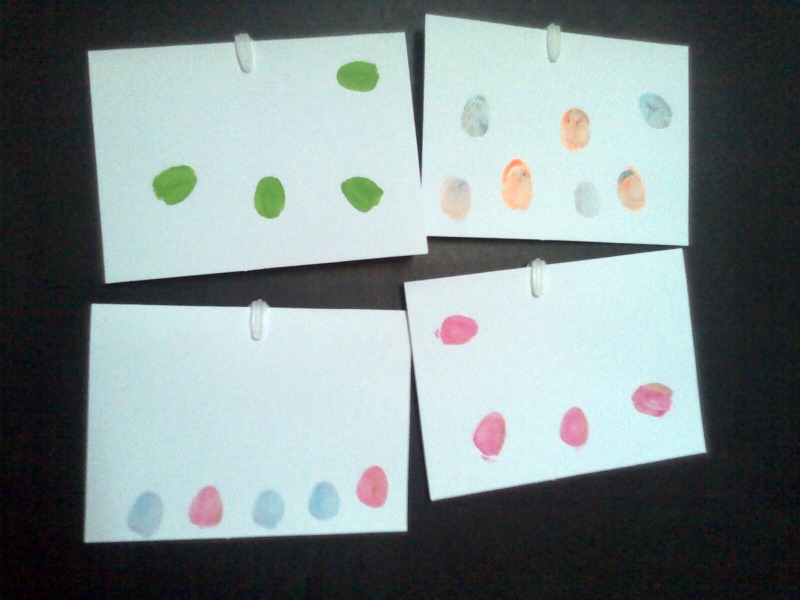
The tooth fairy pillow request did me in.  I knew I had to give this child some guidance as to what would be a nice and not too personal gift for Ms. Janet.  I pulled out the fabric paints and note cards.  I left them on the dinning table and set the bait. I sat on the sofa and channel surfed. I waited patiently until, SNAG!! He took it.  "Hey mom, what if I make Ms. Janet a card with my thumbs?" (can you tell we have made these before?) Yes!! All nighter sewing marathon averted. 

So, this is what both he and I came up with.  He picked the paint. I brushed his thumbs with the paint.  He placed it on the card.  I drew in the details.  Done.  My son could not be happier.  And I hope Ms. Janet is happy with her note cards from my son.

My son's thumb prints

My son's thumb prints turned turtles, chicks and birds

Aren't these super cute?

What a couple of swirls can do for a thumb print.


Related Posts Plugin for WordPress, Blogger...